This one time on a pentest... Is life just a CTF?!
Consider the series like a set of war stories from the front line, not always wins or epic hacks, but sometimes just cool attack paths or equally interesting environments.


At Lares, we find many weird and wonderful engagement attack paths when testing our clients. This series of posts will dive into a handful of our favourites, demonstrating the mind-bending attacks we've carried out in the past. We will take you along for the ride, walking through what got us to the various stages and achieved actions on objectives.
All screenshots and scenarios have been recreated or described in detail in our internal labs; therefore, no client details or information will be mentioned in these posts.
Not every part in this series will be from a pentest; some will be from Red Teams, Insider Threat engagements, and many others. We aim to show some of our fun attack paths and how you might undertake them within your environment. We will also evaluate mitigations, detections, and key takeaways from each.
Starting with Recon
Many engagements we end up doing start from the perimeter as an external penetration test, and through various means, we will often be able to achieve internal access. This scenario, in particular, started like any other external, starting with enumeration and hunting; we tend to use a large amount of external open-source intelligence (OSINT) gathering. We do this to identify critical services and open ports before actively touching services; we achieve this by using services such as the following(note the list is an example but not exhaustive of all the sources):
- Shodan - Searching for open ports, additional domains, services, and other helpful information that mentions the company name in adjacent IP ranges.
- Zoomeye—Similar to Shodan, Zoomeye often provides the information listed above and historical information to identify what services might have been running on obscure ports in the past.
- Hunter.io - Sometimes, it can be a bit hit-and-miss with content. Still, Hunter often gives a good overview of the company email format for formulating password sprays, phishing, and other potential username formatting.
- SpyCloud - Spycloud gives an added edge of breach data and botnet data, which we use in external password spraying and credential stuffing on various services; it also often provides us with an idea of the internal domain name of the customer, which we can then search on all of the other services listed.
- Social Media—LinkedIn for Staff members, Twitter for developers, critical information, and various Telegram channels are also used to identify potential areas of data breaches or historical supply chain issues/new vulnerabilities. For more information on how we do social profiling, we've written about this here.
- Github, Gitlab, and Bitbucket for code repositories and other critical information often reveal internal or historical information about the internal domain.
- Cloud Resources—Azure AD Internals, Greyhat Warfare, GCP/AWS/AZ discovery: Most cloud resources can be identified using open-source intelligence gathering, with a wealth of tools available to our consultants.
Breaching The Perimeter
Once we have an idea of the perimeter, the footprint, and what services look attractive, we can start planning a route into the environment. What does this look like? What tools, such as credentials, scripts, social engineering, or other techniques, can we leverage in our toolbox?
Typically, we like to start with credential stuffing and brute-force attempts. We have access to SpyCloud, which provides a wealth of information from breaches and botnets, often serving as cheat codes to emulate real adversaries.
In this scenario, we identified that RDP was running on a non-standard port and that a single-factor VPN portal was exposed. With the help of ZoomEye and Shodan, we validated that the host had the port open to negate the need to port scan and potentially alert our target.
The steps below detail the identification and connection on a non-standard port:
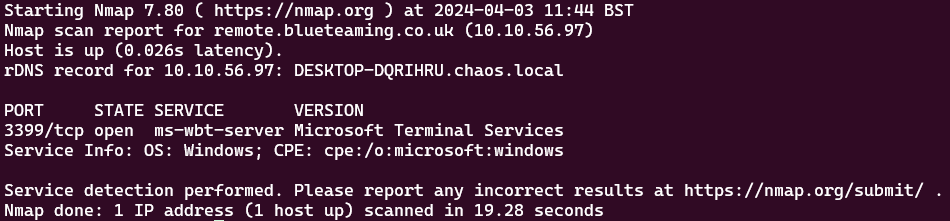
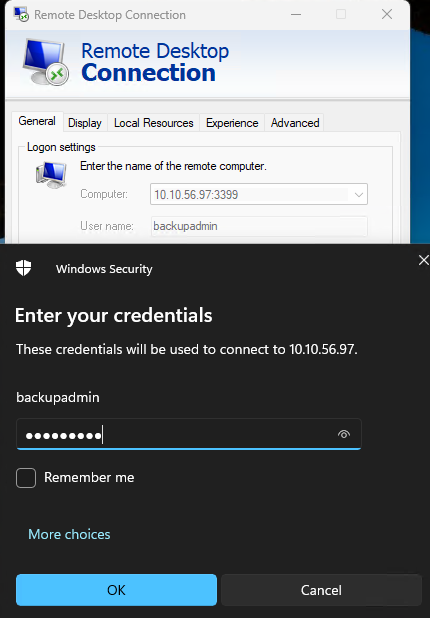
Once the port was identified, we were able to connect using mstsc.exe also known as remote desktop, and authenticate it with the previously found credentials. Certain users in this environment had Okta Verify set up multi-factor authentication to access other services via Okta single sign-on. Still, in many cases, this was not configured for RDP. Thus, it was possible to traverse to the remote host and connect with a single-factor set of credentials:
In addition to the RDP host, we identified a single-factor VPN endpoint granting access to a development environment. In this particular test, there was no connection between dev and prod; however, we have observed this setup in other client environments and have been able to jump between environments.
Navigating the Internal Minefield
Once initial entrenchment was achieved, the first step was to enumerate the local system to identify any potential paths for lateral movement and domain privilege escalation, as the assessment was not primarily focused on evasion of detections, and the primary objective was going after privileged access.
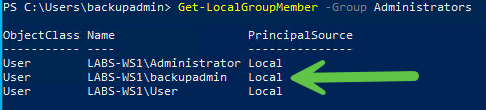
We found that our user,backupadmin was indeed an administrator using the Powershell module Get-LocalGroupMember -Member Administrators
With this information, it was time to explore our potential attack paths within the environment. At the back of our mind, we thought this may have been a honeypot host, so we remained cautious in our approach.
We began executing a slightly modified version of SharpEDRChecker (This tooling can be executed as a standard user and enumerates various paths, services, running tasks and DLLs on disk to identify defensive products in use) to identify and profile the defensive stack. This revealed a reasonably box-standard Windows setup with Defender and Antimalware Scan Interface (AMSI).
[!] Service Summary:
	[-] mpssvc : defender
	[-] PolicyAgent : defender
	[-] SecurityHealthService : securityhealthservice
	[-] Sense : defender, threat
	[-] WdNisSvc : antivirus, defender, nissrv
	[-] WinDefend : antimalware, antivirus, defender, malware, msmpeng
	[-] wscsvc : antivirus


[!] Driver Summary:
	[-] WdFilter.sys : antimalware, malware
	[-] WdNisDrv.sys : defender

If you see Defender there is a high chance A M S I is there too
With this in mind, we were also able to enumerate where some exceptions were applicable for Defender-excluded paths using the fact our user was an administrator and built-in PowerShell tooling:
Get-MpPreference | Select-Object -Property ExclusionPath -ExpandProperty ExclusionPath
This led to the discovery of C:\BackupLogs which appeared to be a Defender exception; upon browsing this folder, there were some interesting named files:
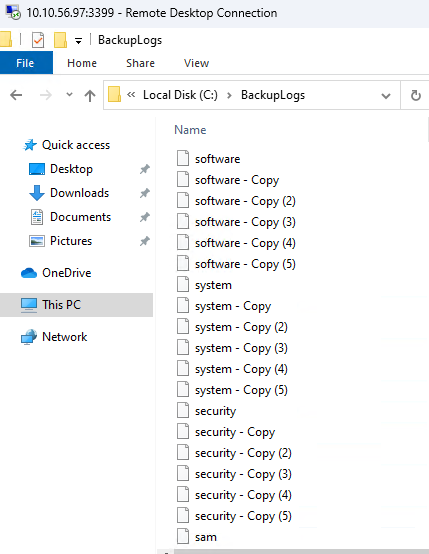
The files found appeared to be nightly backups of the SAM, SYSTEM, SECURITY and SOFTWARE registry keys, so we decided to see if we could decrypt them. Until now, we still believed this might be a honeypot, but it also felt a bit like a capture-the-flag (CTF) box!
Cracking the Secrets
With these files and the ability to operate in Defender's exceptions folder, we copied across a py2exe version of secretsdump to the system to decrypt the local Security Accounts Manager (SAM) database (which is used to house all the local users on the system's usernames and password hashes) using the following command:
secrets.exe -sam sam1 -system system1 -security1 security LOCAL
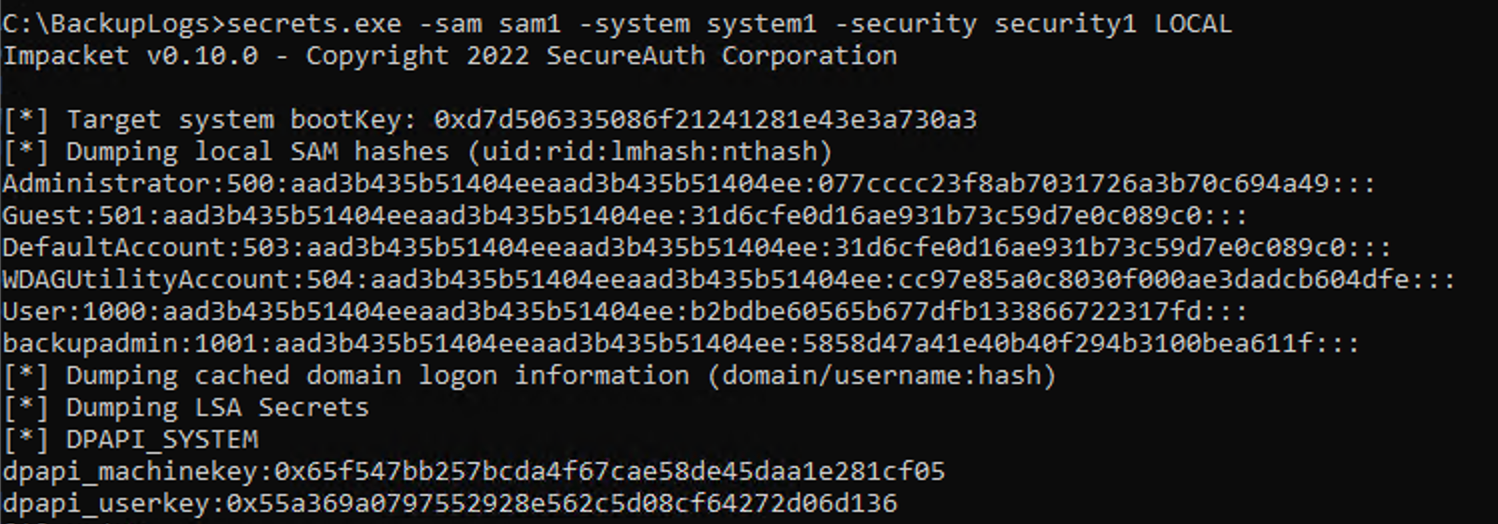
This was done to obtain the NTLM hash value for the administrator and other users. In many cases where Local Administrator Password Solution (LAPS) is not in use, the administrator hash is likely shared across systems within the environment. Either by cracking the password, forging a Kerberos ticket, or passing the hash, it is possible to traverse the environment easily to gain vertical privilege escalation.
In this case, we opted to crack it using our hashcat rigs, the syntax for which was as follows:
hashcat.exe -m 1000 warstories.txt wordlists\result.txt -r rules\Lares.rule -OThe command line arguments for the above are as follows:
hashcat.exe- Running hashcat on Windows.-m 1000- Setting the mask to type 1000, which is NTLM hashes.warstories.txt- This is the file containing the NTLM hashes to be crackedwordlists\result.txt- This is our wordlist, a combination of previously cracked domain and local passwords.- -r
rules\Lares.rule- This is our ruleset for permuting the entries in the wordlist to ensure we hit different variations of words, append different characters, and make other modifications to the entries. -O- Use the optimised kernel for GPU cracking of the passwords.
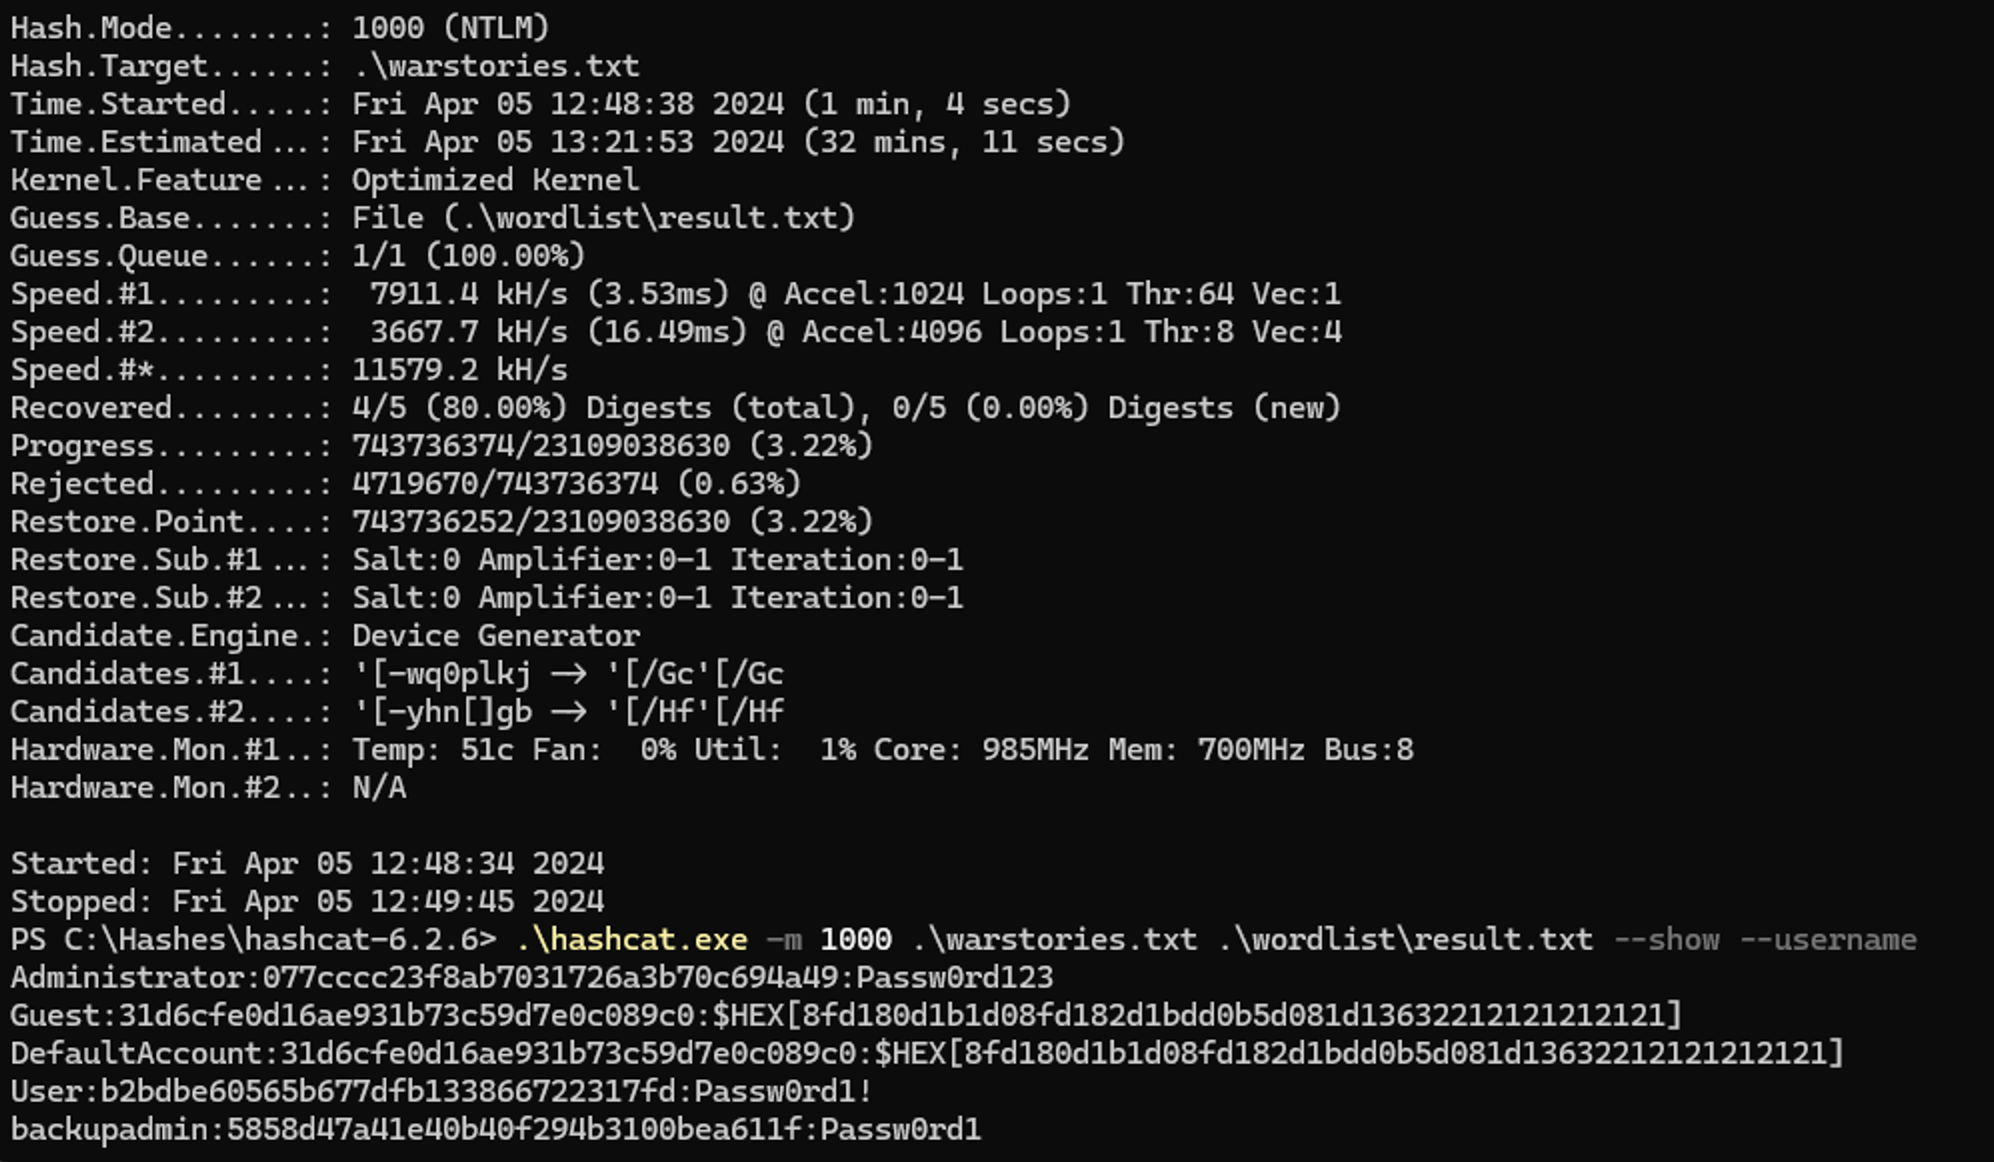
This resulted in the retrieval of both the Administrator and User clear-text passwords. However, you'll notice that the Guest and DefaultAccount users have weird-looking passwords; these are essentially blank passwords as the accounts are not enabled, which is how hashcat represents them.
Administrator:077cccc23f8ab7031726a3b70c694a49:Passw0rd123
User:b2bdbe60565b677dfb133866722317fd:Passw0rd1!
backupadmin:5858d47a41e40b40f294b3100bea611f:Passw0rd1Once the password had been cracked, the next step was to identify if the administrator password was shared across other hosts within the environment and to target additional domain reconnaissance.
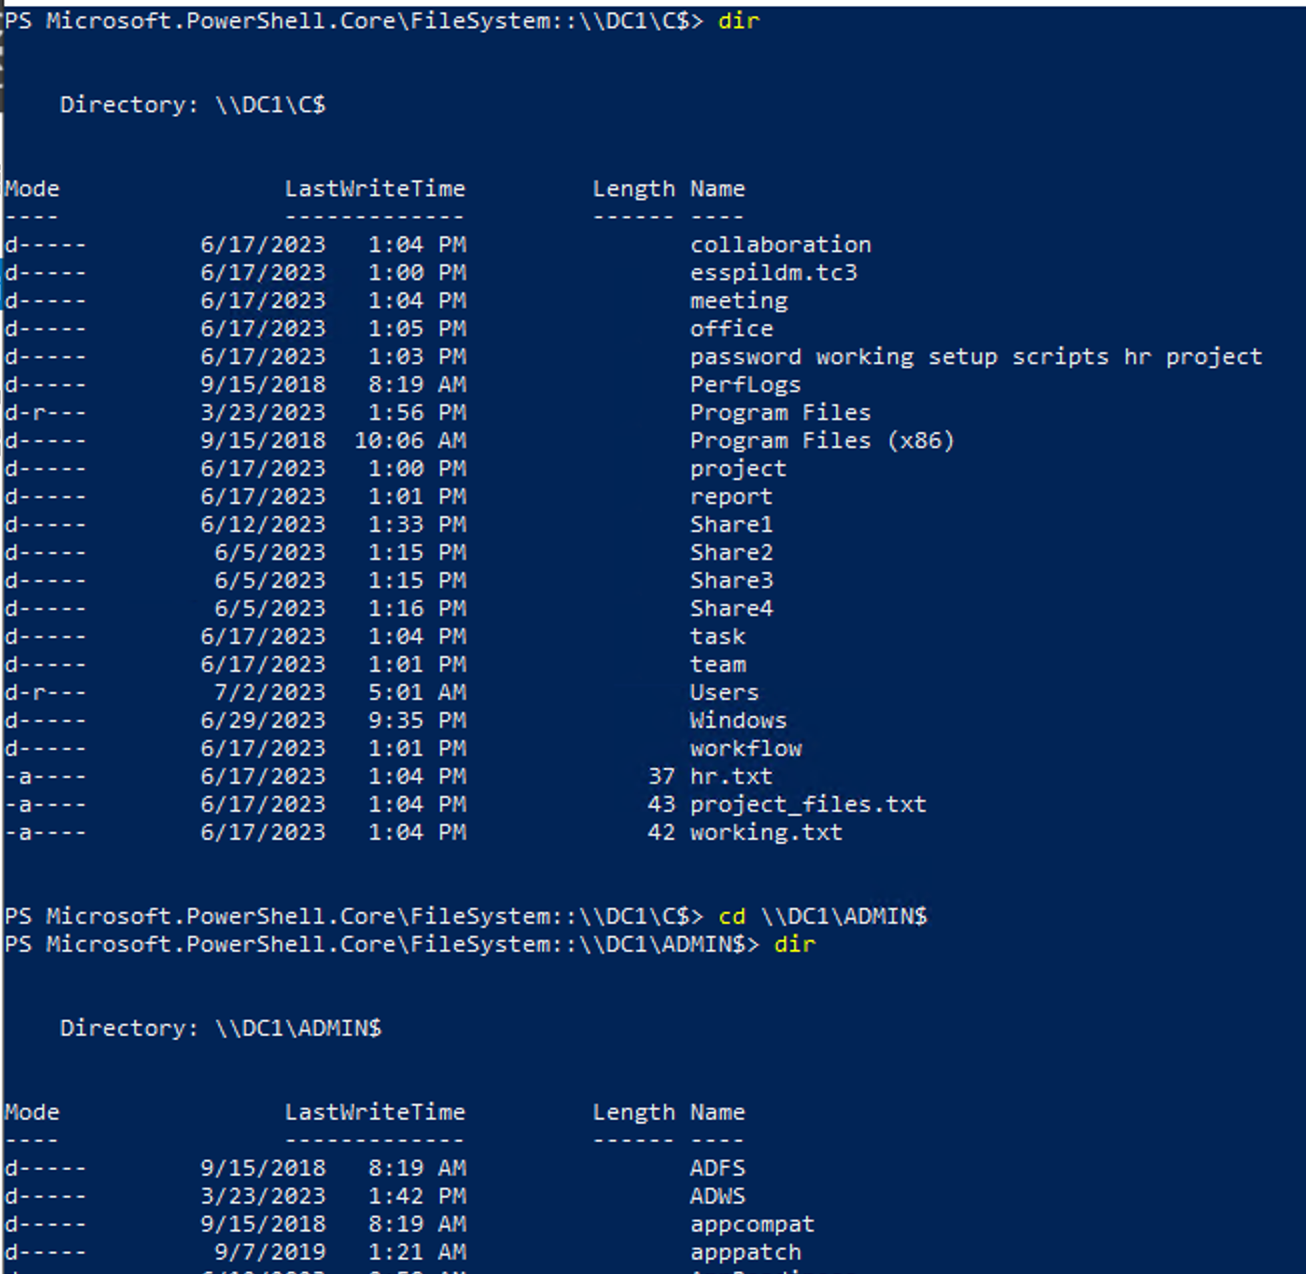
We leveraged Explorer and PowerShell from the compromised machine to determine whether we could authenticate to the domain controller using the local administrator password, which was successfully cracked. This resulted in connecting successfully and mounting both the C$ and ADMIN$ shares, indicating that the credentials were shared, at least for the RID500 Administrator account.
At this stage, by having a local admin on a domain controller, we could add ourselves to the Domain Admins group or perform other administrative tasks. We created a Lares user and proceeded with this moving forward to enable the client to identify the pentest activity quickly and deconflict where necessary.
Domain Admin is Just the Beginning
Frequently, on assessments, we find that getting domain admin is only the beginning, and further compromise and coverage of the environment often take place post-compromise. Sometimes, the keys to the kingdom are not enough, and going for broader coverage of sensitive data, credential matter, and other areas of the network become our focus.
As such, the attack path continued. We could freely traverse other systems within the environment and uncover additional sensitive information. One of our favourite tools to leverage on pentests of Windows environments is Snaffler, as it does an excellent job crawling shares, indexing available files, and searching them for sensitive data.
Using the exception folder once again, we copied Snaffler across and executed with the following flags:
Snaffler.exe -s -o Logging.txtThis tells Snaffler to run with the default ruleset and regular expressions and write it out to an output file called Logging.txt.
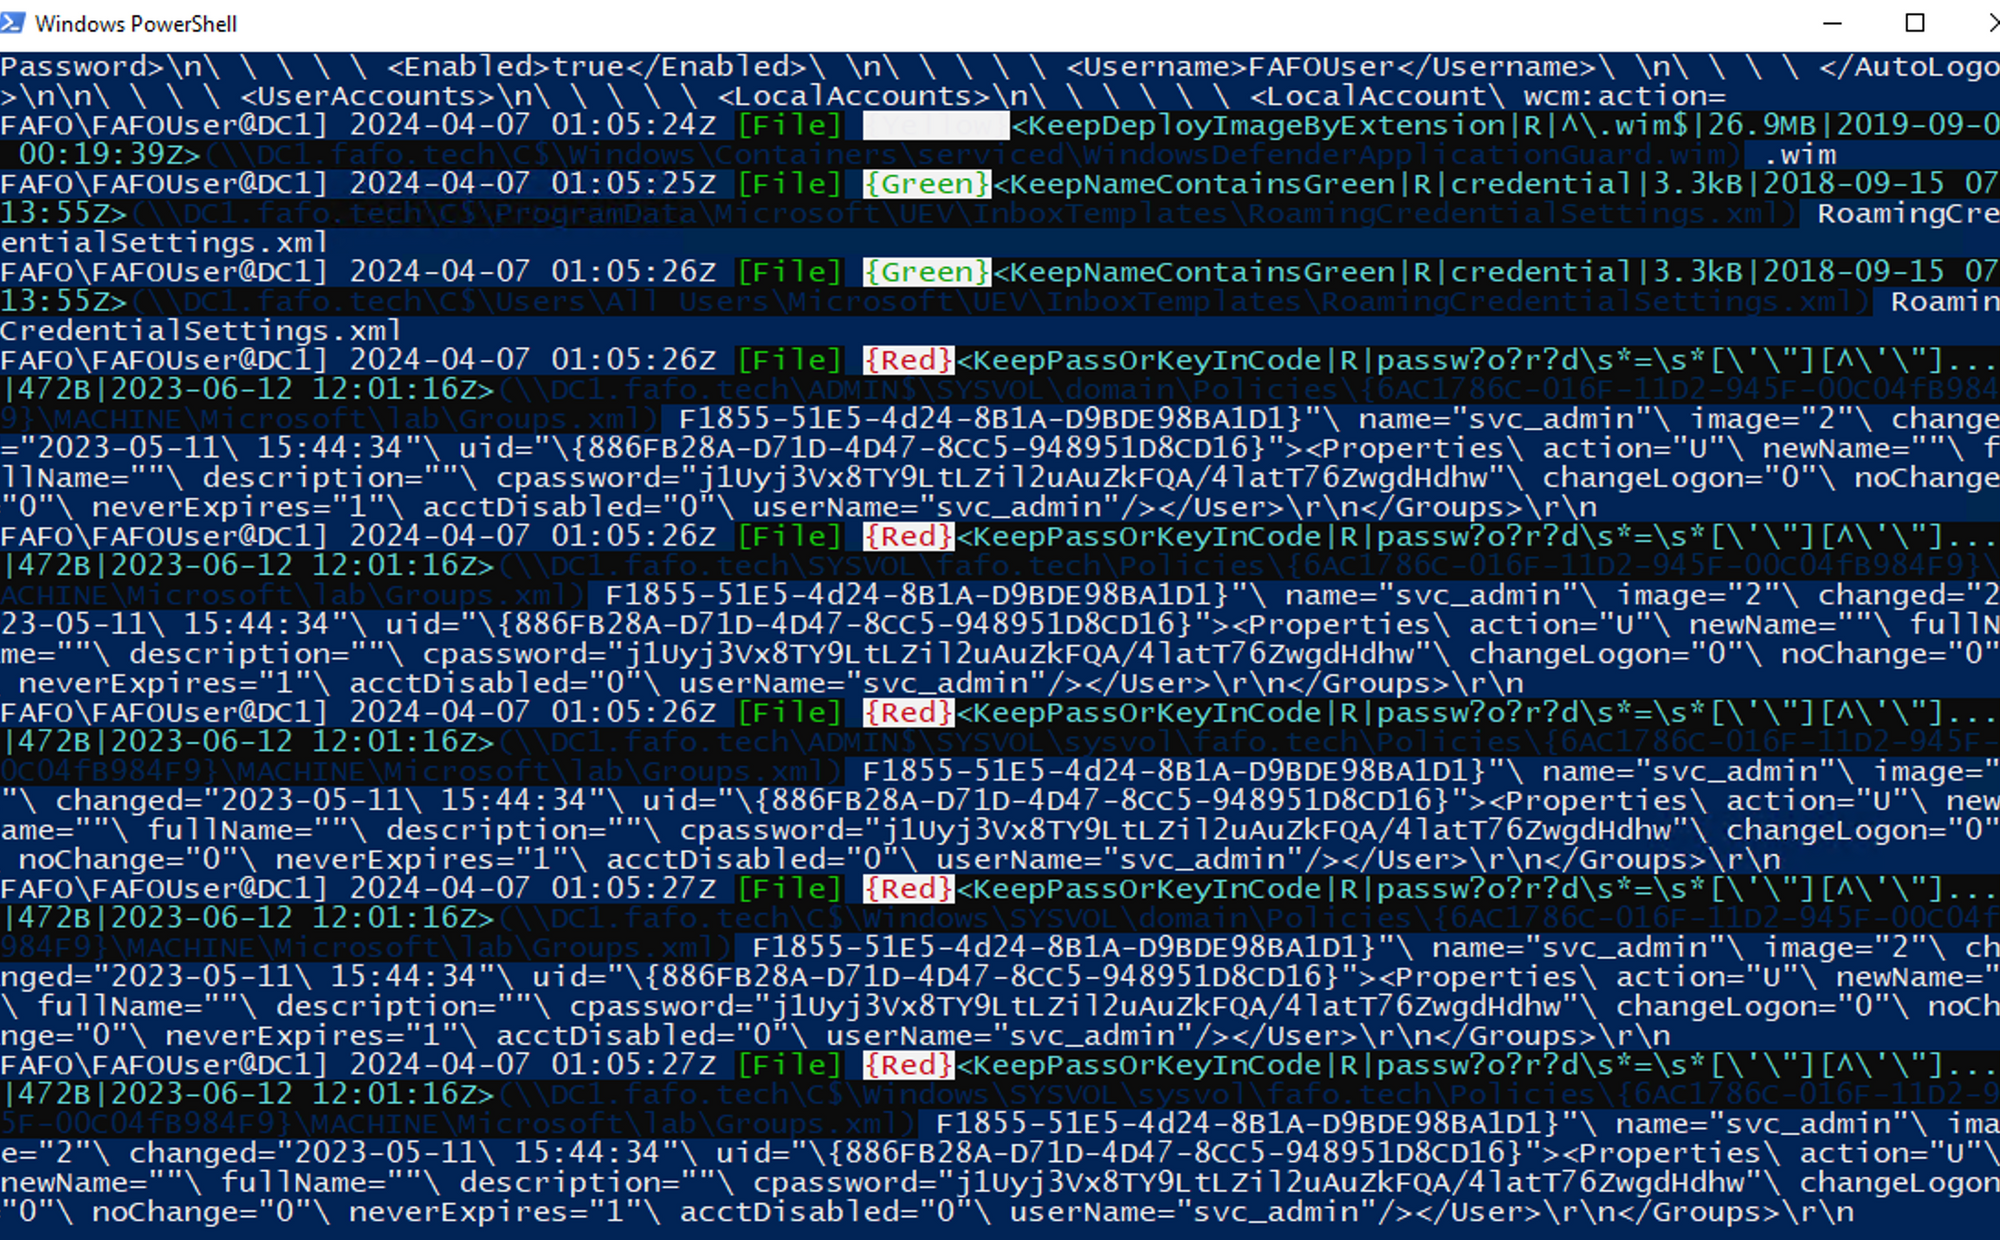
For this example, we have placed several files in the domain for snaffler to find; the output can be deciphered like so:
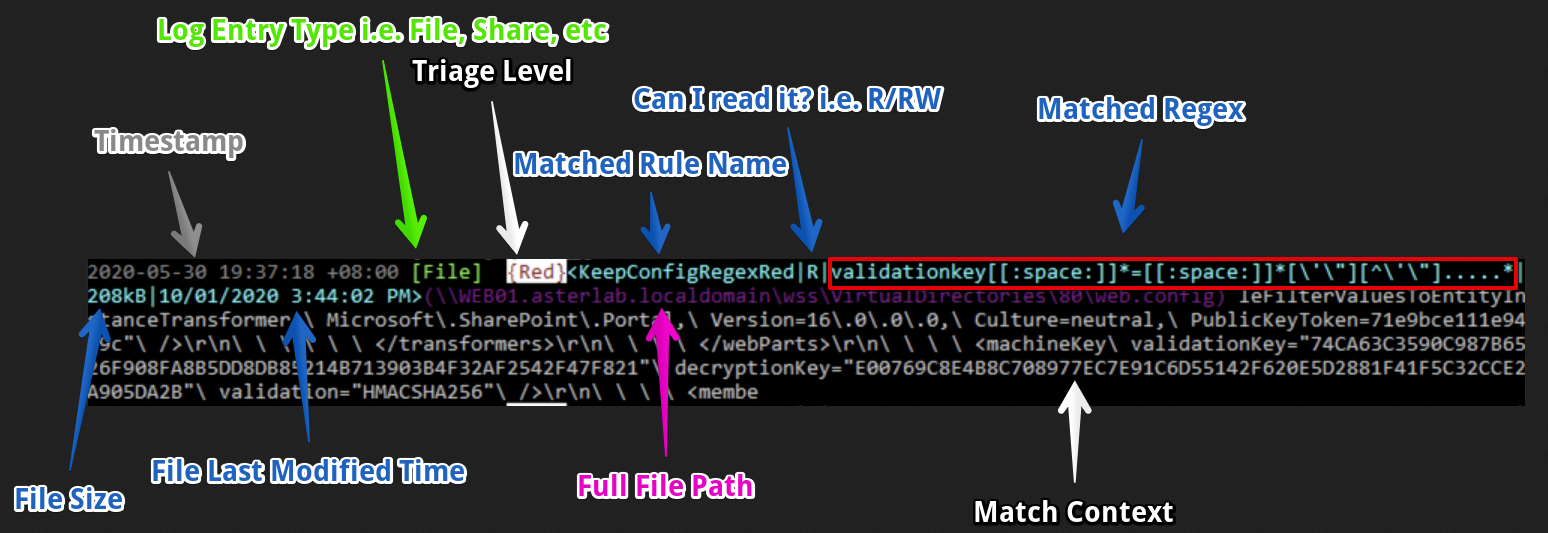
Running snaffler enabled further identification of sensitive information, which in this case was looking for data related to domain trusts and other client information. The output was several hundred megabytes, parsed and listed into a CSV for the client.
Attack Path Summary - How We Got Here
This first part of the series walked you through an attack path from the Internet, starting from an unauthenticated perspective, successfully gaining access to valid credentials, paired with single factor authentication and remote desktop externally facing, we were able to compromise the system successfully, obtain local administrator access and escalate our access to that of domain administrator, then perform post-exploitation activities to get data governance coverage of the environment.
Conclusion
To successfully protect yourself from an attack path like this, several key recommendations can be followed;
- Ensure you have Multi-Factor Authentication enabled and enforced for all users
- Lock down your perimeter to ensure that RDP and other remote access protocols are restricted to set IP ranges if they need to be externally facing or disabled for internal use only.
- Set a robust password policy with word denylists to prevent weaker password creation. Consider implementing the suggestions detailed in our Password Analysis post.
- Consider implementing LAPS or a similar privileged access management solution to prevent local administrator password re-use.
- Perform regular external asset discovery to ensure your perimeter is under control and you know what assets you have.
Moreover, organisations should embrace the principle of 'defence in depth'. This is a comprehensive approach to cybersecurity that layers multiple defensive mechanisms. If one mechanism fails, another steps in immediately to thwart an attack. This approach involves technological solutions and encompasses policies, procedures, and awareness training to ensure that all possible security gaps are covered.
How can we help?
Here at Lares, we help empower organizations to maximize their security Potential.
If you would like any further information, you can get in touch here or head over to the Lares.com website for more information about how we can help.